Pages

Showing posts with label cabinets. Show all posts

Friday, November 30, 2012

Final push on the kitchen (Part II)

When we last left our crazy young couple, they were building and staining cabinets like mad. Next up, varnishing and hanging doors! We used a low-odor, water-based satin acrylic from Minwax. We only did a single coat on all the cabinets and doors because we didn't want things super glossy.

Varnished cabinet doors dry on the counter tops, awaiting installation

Brigitte prepping the cabinets
By about noon every available surface was covered with cabinet doors and drawer faces drying.  Don't believe me?  Wait for it...

Even the laundry rack is not safe from our cabinet shenanigans! 

It didn't take long for the varnish to dry enough to start installing the drawer fronts and doors. But we ran into a snag when we couldn't find the box that we had put all the screws in. After a couple trips to the hardware store for replacements...we found the box. 

Justin attaches drawer fronts


And a few hours later...tada!


Like I said, there are still a lot of little things left to finish up over the next couple weeks. Most of which shouldn't disrupt our use of the kitchen for more than a day. Right now, we're just excited to be able to cook a meal with something other than a hot plate! More posts to follow as we polish up the details. Stay tuned!


Thursday, November 29, 2012

Final push on the kitchen cabinets (Part I)


9 PM Friday night...


...9 PM Sunday night!

This past weekend, we made a major push to get as much done on the kitchen as possible, and we were able to get it completely functional! There are a lot of little details (lighting, drywall, trim, back splash tile, etc) that will still need to be done. But after two months without a kitchen, we were both pretty excited to get it finished enough to move out of the basement mess hall.

Brigitte spent the weekend diligently sanding and staining all the cabinet doors. I had my work cut out for me routing the new microwave vent, building a custom cabinet to cover the mess, varnishing, and rehanging the doors.

The sanding and staining station
After a whole day of sanding, Brigitte gave each door two coats of Veristain "Traditional Pecan" stain. She did a great job, and the finish has hardly a single run or dark spot. Considering this was all done by hand, it was pretty labor intensive. But the first one she worked on looks just as good as the very last one, and that's saying something.


Brigitte at work on the cabinet doors

Meanwhile....in the kitchen. I had hoped to route the microwave vent straight out the back. Unfortunately, I hadn't considered the beam that runs through the center of the kitchen. It's supported by a 6x4" post right behind where I wanted the exterior vent to run.

Justin drilling a hole for the vent

Since I couldn't route the vent where I wanted, I had to re-route it about 10" from the top of the microwave to the one spot between the cabinets free of any structural supports. I used a 4" Milwaukee holesaw until I got to the exterior siding. Then, I went outside to drill through the other side.  

Preparing to install the vent

Once that was done, I had to try to rearrange to vent fittings to fit the awkward angle from the microwave to exterior vent. Once everything was connected, I wrapped aluminum duct tape around the joints to prevent grease from the vented smoke leaking into the wall.

Fitting the vent
Because of the way we vented the microwave, we had to construct a custom cabinet out of oak to cover it up. This is the second custom cabinet I've built for this project. I really can't say enough good things about the Kreg Jig. It's certainly earned it's keep on this job.


Custom cabinet to cover up the unattractive venting

Now that's a lot of Kreg joints!
Installing the microwave took a couple of attempts to line it up properly with the vent. The upper cabinet was reinforced to support the weight of the microwave. Considering that with this cabinet, we really just set out trying to make lemonade out of  lemons, I think this turned out really nice. 


Stove, microwave, and beautiful shelf!

Obviously we're not done yet.  Stay tuned for Part II: "gonna have ourselves a door hanging!"


Tuesday, November 13, 2012

New countertops: the Black Pearl has arrived!

Shiny new granite countertops

Our new counter tops are here, and they look fabulous! After weeks of waiting (and having issues with Home Depot), our kitchen is now starting to resemble a place where one might actually prepare food. In these photos, they appear jet black. They're actually a combination of black and gray (the color is called "Black Pearl").

Before: no countertops. :(

After: counter tops!
 Can you tell I'm excited?

When Justin came home, he walked into the kitchen with eyes covered and said, "I don't want to look!" And when he opened his eyes, the first words out of his mouth were "holy" followed by an expletive.

Neither of us has ever had granite counters, and the difference between that and run-of-the-mill laminate is astounding. Plus, when you consider how...um..."construction-zone-chic" our kitchen has been looking since summer, you can understand why something actually NICE looking would come as a sort of shock.


View from the sun room door
 These photos really don't do the counters justice, and that's largely because the rest of the kitchen is still such a work-in-progress. But just wait until we finish those walls and cabinet doors!

Lonely little corner cabinet

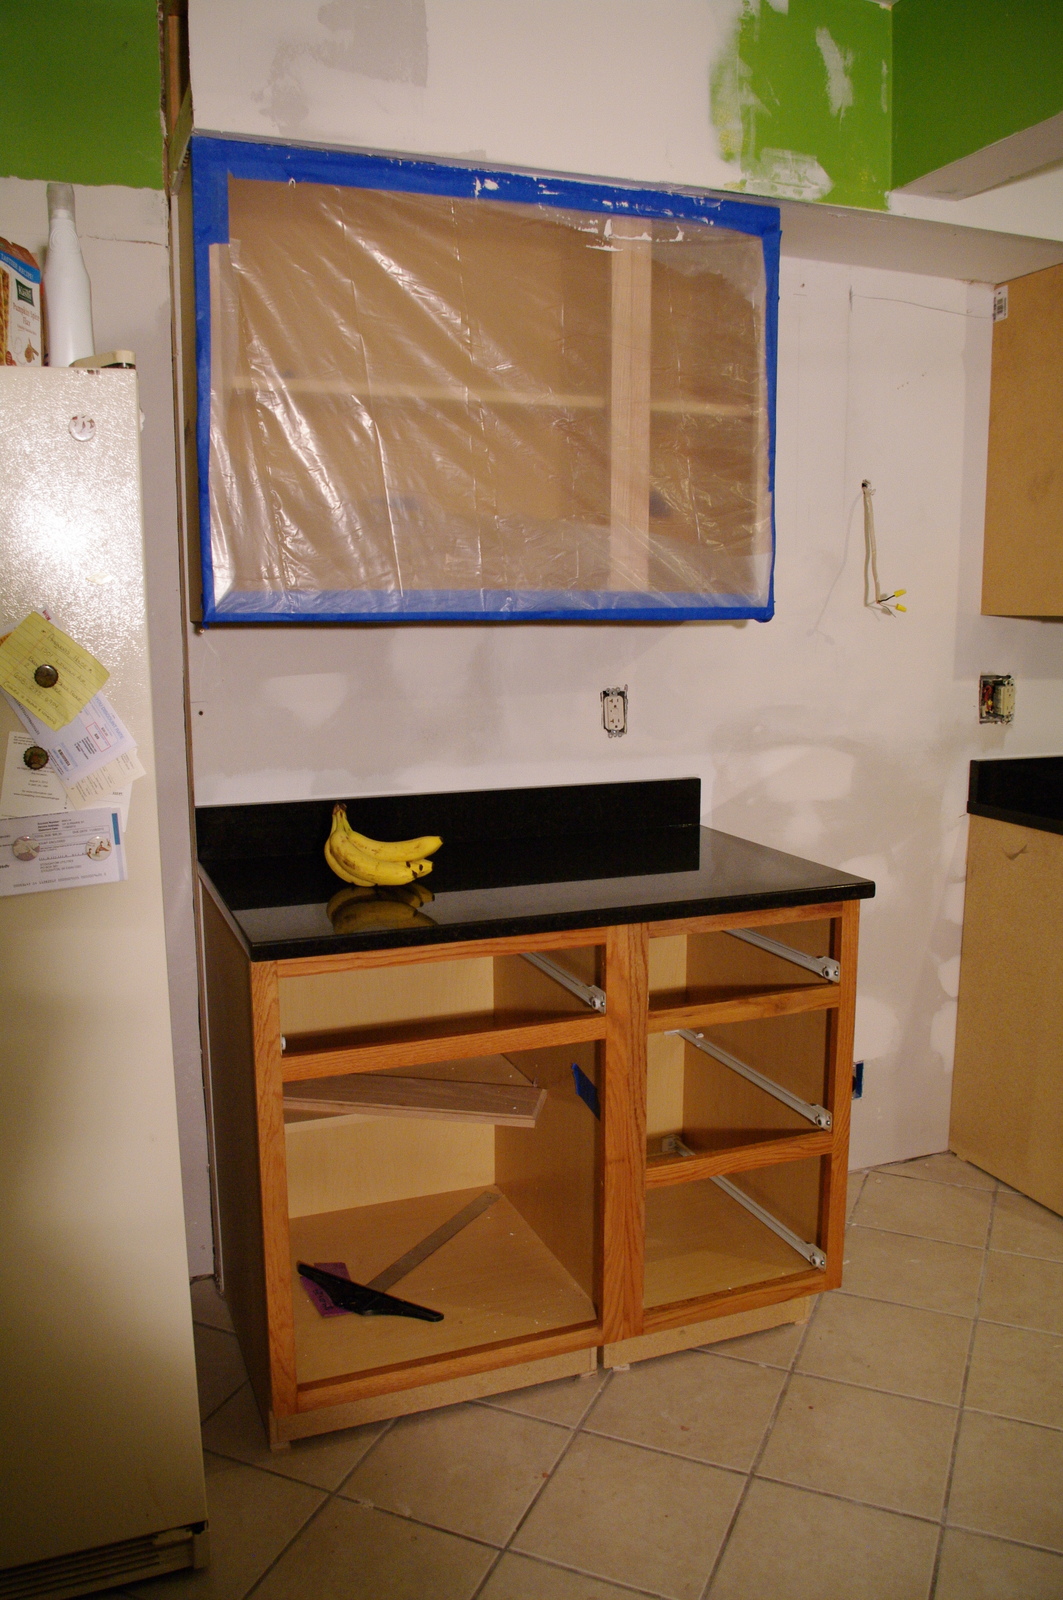
Still life with T-square and bananas
 Last night, we did some last minute projects to prepare for the install. Justin cleaned up the enameled cast iron sink we picked up at the Restore for a cool $20 (EDIT: Justin would like you to know that this is a Kohler sink that retails for $210), removing the scratches and blemishes with a pumice stone and Comet.


Justin preps our new (to us) sink

Enameled cast iron is easier to clean than people think

The crud left behind after cleaning the sink
We also started staining the cabinets in the "Golden Pecan" stain we picked out months ago.


Justin stains the cabinets

Golden Pecan stain on unfinished oak cabinets
We still have a LOT to do before the kitchen is finished. Here's a short list:
-- Install sink (including new faucet and garbage disposal) and hook up plumbing
-- Install microwave/vent over stove
-- Install light fixtures
-- Patch drywall near fridge
-- Finish up misc. electrical
-- Primer the 2nd half of the kitchen; paint texture over entire kitchen
-- Stain cabinets and reattach doors/drawer faces
-- Add a tiled backsplash

We will also eventually set up the kitchen island and finish building the butcher block top that Justin started a while back.

It's a lot of work, but we've come a long way, and it's going to be amazing when it's done!


Friday, August 17, 2012

Kitchen Layout: the Moment of Truth!

To get a general idea of our new kitchen layout (and to make sure all our measurements were correct), we arranged our appliances and new cabinets on the now-vacant kitchen floor. Will they fit?!


Why yes, they will fit, and quite nicely at that. We did have to modify the design slightly, but it all worked out perfectly. 

As you can see above, we moved the fridge to a more convenient location, away from the back door. The window behind it will be coming out (it's a north-facing window, and we have enough other windows nearby that it's not a big loss). We will also have a spacious island with a handmade butcher block top (more on that later). 


Our cabinets are unfinished oak. We really wanted oak, and buying them unfinished made this an affordable option (it also means we have more stain colors to choose from!). 


We didn't bother moving in the sinktop cabinet or any of the upper cabinets, obviously. But this gives you a pretty good idea of how it will look. It's such a better use of the space than what we had before! 


Wednesday, August 15, 2012

Kitchen Demolition: Mission Accomplished


Kitchen: Demolished!
This is what it looked like just a few days ago

Kitchen demolition is complete! It went a lot quicker than I had anticipated. What took the longest was packing everything up and moving it out--either upstairs, out of the way, or in the basement, in our makeshift kitchen (that was my job). Ripping out cabinets and moving appliances was a fast process with three people working together (although, let's be honest, the other two did most of that job, while I took pictures and lugged things out to the dumpster).

Tearing out the countertop

The stove is gone; here go the cabinets!

Justin uses his trusty Makita drill to take down shelves

And the shelves come down!

Displaced dishwasher and stove where the breakfast nook used to be

There's no going back now!