 |
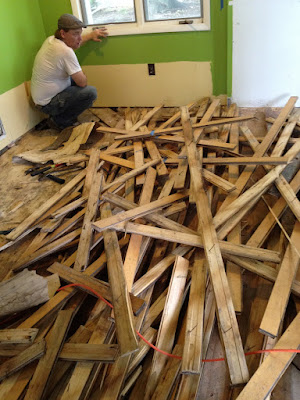
| Brigitte pries up an ornery piece of maple flooring |
That's a lot of wood! We'll save some of it for future projects (like our butcher block island)
Ah, that's better. Wood all cleaned up, paper all rolled up. Now we can get a good look at the subfloor.
 |
| A knot, aka a secret spy hole into the basement |
Since it's made of old-growth wood, the sub-floor has plenty of knots. These tend to fall apart over time, leaving holes. We will need to add some plywood and filler behind them.
A few sections of the old sub-floor were too damaged to leave in place. We replaced them with sections of 3/4" plywood, which we secured with 2x4 blocking.
 |
| Brigitte screwing around. |
 |
| Justin laying down glue for the plywood |
With all of the sub-flooring prepared (new and old), we added a layer of 1/4" plywood over the whole thing to create a nice, consistent layer before adding the tile backer. We first glued it down, then screwed it to the sub floor.
 |
| 1/4" plywood, glued and screwed over the sub-floor |
 |
| Justin lying down on the job! |
Once we had a consistent surface, we checked to see how level it was. We found a 3 foot run where the floor has a 1/4-1/2" drop heading toward the chimney. Unfortunately, fixing this would be a major structural repair we can't afford to address at this time. To correct the problem we would need to put up floor jacks in the basement, and to do that, we would have to revamp all the plumbing (which we're planning to do at some point, just not right now).
Luckily, the area where the cabinets will be installed is all consistently level now. The area that droops is isolated to a corner where we have not planned to install anything but flooring. We will just have to live with this for now and see what ramifications this might have later on down the road.


You guys are making huge progress, but I bet you'd move faster, if Justin would get up and help. Hehe.
ReplyDeleteHey after all that heavy lifting he did, he deserves to take a break now and again, but I never suspected he'd lay down on the job!!! LOL
ReplyDelete